How to Replace Basement Windows: A Step-by-Step Guide
May 05, 2025If you’re looking to learn how to replace basement windows, this guide is for you. We’ll walk you through each step, from evaluating your current windows to installing new ones. Whether your windows are drafty, damaged, or outdated, our easy-to-follow instructions will help you achieve a professional finish.
Key Takeaways
- Identify when to replace basement windows by looking for drafts, condensation, and physical damage.
- Preparation is key; know your tools, measure accurately, and understand the window types to ensure a smooth replacement process.
- Proper maintenance, like regular inspections and seasonal care, extends the lifespan and efficiency of your new basement windows.
Understanding Your Basement Windows
Basement windows significantly enhance your home’s functionality and comfort. They allow natural light to enter and improve air circulation, making the space more livable by reducing dampness and mustiness. Egress windows, in particular, offer a crucial safety feature, providing an emergency exit during fires or other emergencies.
Choosing the right basement window can boost light, ventilation, and security. Whether your priority is energy efficiency, security, or an improved view, knowing the various types and their benefits will guide you in making an informed decision.
Types of Basement Windows
Several types of basement windows are available, each offering distinct advantages:
- Hopper windows open inward for excellent airflow.
- Sliding windows feature horizontally moving panels, providing ease of use and good ventilation.
- Double-hung windows can be opened from the top or bottom, offering versatile airflow options.
Another popular choice is glass block windows, which offer superior insulation and energy efficiency. They are also known for providing privacy and security without sacrificing natural light.
Egress windows, on the other hand, are essential for safety, designed to allow easy escape during emergencies while also ensuring proper ventilation. Understanding these options will help you choose the best egress window replacement windows for your basement’s specific needs.
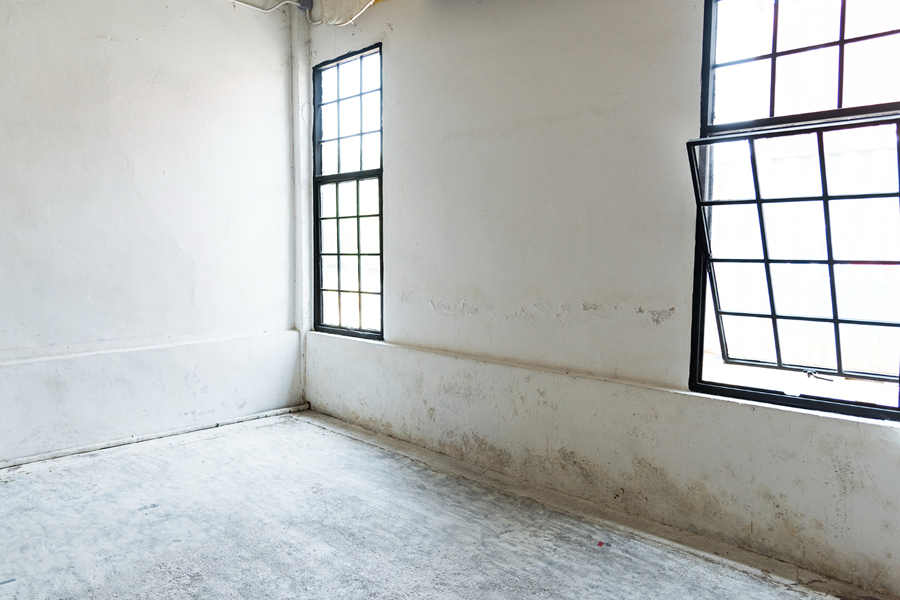
Signs Your Basement Window Needs Replacement
Recognizing when to replace basement windows is vital for maintaining home comfort and energy efficiency. Common signs include drafts and condensation between panes, indicating compromised seals and reduced performance.
Physical damage is another telltale sign. Cracked glass, deteriorating seals, and leaks can all signal the need for a basement window replacement. Addressing these issues promptly can prevent further damage to your home and help maintain a comfortable living environment.
Preparation for Basement Window Replacement
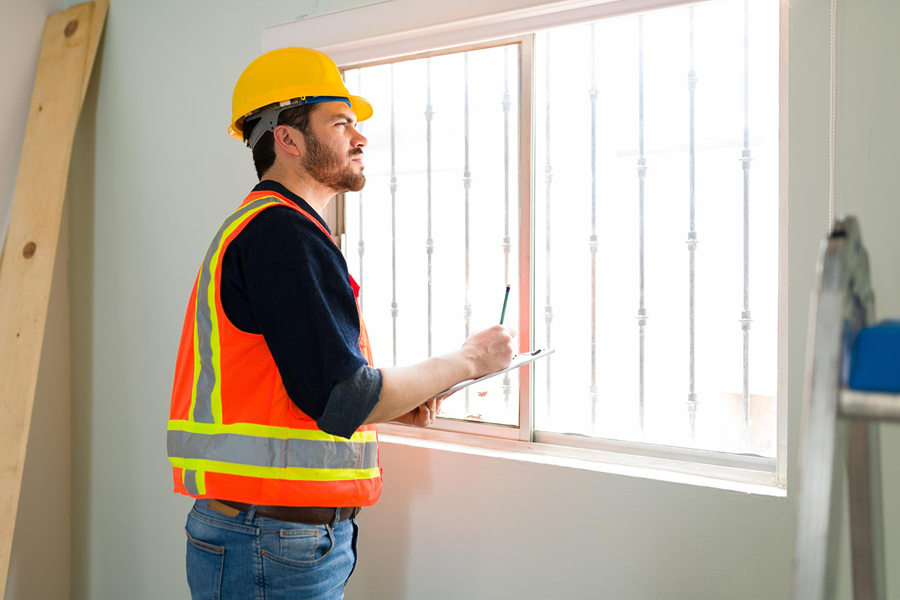
Proper preparation is essential for a successful basement window replacement. Begin by evaluating the framing material around your current window, whether it’s wood, aluminum, or another material, to determine the necessary tools and techniques.
Proper preparation is essential for a successful basement window replacement. Begin by evaluating the framing material around your current window, whether it’s wood, aluminum, or another material, to determine the necessary tools and techniques.
Identify all attachment points and fasteners securing the window to streamline the removal process and avoid unexpected obstacles. Proper preparation will ensure a smooth transition from old to new windows.
Tools and Materials Required
Before:
Assembling the necessary tools and materials beforehand saves time and effort. Essential tools include a hammer, pry bar, utility knife, spray foam, screws, and a reciprocating saw. Removing leftover caulk from the wood frame with a utility knife is crucial for proper preparation.
Text with incorporated keyword:
The project was evaluated for its efficiency, and the total cost was found to be within the budget. The team worked completely to ensure all aspects were covered.
Essential tools for assembling your project include:
- Hammer
- Pry bar
- Utility knife
- Spray foam
- Screws
- Reciprocating saw
Removing leftover caulk from the wood frame with a utility knife is crucial for proper preparation.
You can find most of these tools and materials at your local hardware store. Being well-equipped will help you handle any challenges that arise during the window replacement process, ensuring a smooth and efficient project.
Measuring the Existing Window Opening
Accurate measurements are crucial for a successful replacement. Measure the width at three points: the top, middle, and bottom to account for any irregularities.
Then, measure the height from the highest point of the window sill. Consistently measuring in inches ensures a good fit, making the installation process smoother.
Removing the Old Basement Window
Clear the work area and ensure safe access before removing the old basement window. Inspect for potential sealing or insulation materials that may need removal.
Take care to avoid damaging the surrounding wall structure during removal. This careful approach maintains the integrity of the window opening, facilitating easier installation of the new window.
Steps to Remove the Old Window
Before: The first step in removing an old basement window is to take off the interior trim using a hammer and pry bar. Next, unscrew the hinges attaching the sash to the window frame and remove the sash. Use a utility knife to cut through any paint or caulking around the window.
After:
- Take off the interior trim using a hammer and pry bar.
- Unscrew the hinges attaching the sash to the window frame and remove the sash.
- Use a utility knife to cut through any paint or caulking around the window.
To remove the window frame from the rough opening, follow these steps:
- Use the hammer and pry bar to carefully remove the frame.
- If necessary, cut the existing wood or aluminum window frame with a reciprocating saw.
- Ensure that the goal is to achieve a clean, smooth, and square opening for the new window.
Installing the New Basement Window

Installing the new basement window involves steps to ensure a secure fit. Begin by dry fit the window to check the fit and make any necessary adjustments to install it.
Once the window is level and fits well, secure it with screws or spray foam, and seal the exterior with flashing tape to prevent water intrusion. This ensures the new window is securely stabilized and adequately sealed.
Preparing the Window Opening
Clean the wood frame of the window opening by removing old caulk and paint. Sand the surface smooth and vacuum any debris to ensure a clean workspace.
After the foam insulation cures, trim any excess foam for a clean surface before installing the interior trim. Priming and painting both sides of the trim pieces before installation enhances durability and moisture protection, ensuring successful window installation.
Installing the New Window
Begin by dry fitting the new window to ensure it fits well and is level. Use rot-resistant shims to stabilize the window and secure it by driving screws through the frame into the surrounding structure.
Begin by dry fitting the new window to ensure it fits well and is level. Use rot-resistant shims to stabilize the window and secure it by driving screws through the frame into the surrounding structure.
Fill any gaps with spray foam insulation to provide extra protection against air leaks. Finally, seal the exterior with flashing tape to prevent moisture ingress. This ensures the new window is securely stabilized and adequately sealed, enhancing its performance and longevity.
Finishing Touches on Your New Basement Window
Finishing touches ensure a polished look and proper sealing. Trimming the window closes any gaps and provides a neat appearance.
Allow insulation to cure around the window, then cut any excess foam for a clean finish. Prime and paint the trim for added moisture protection. These finishing touches enhance the look and functionality of your new basement window.
Trimming and Sealing
Trimming and sealing the new window involves applying caulk, nail filler, and touch-up paint to enhance aesthetics and ensure proper sealing. After the spray foam insulation cures, use a utility knife to cut away any excess foam for a clean finish.
Prime and paint each side of the trim pieces to protect them from moisture and enhance durability. If the old window trim is carefully removed and the new window is the same size, you may be able to reuse it, saving time and resources.
Tips for a Successful Basement Window Replacement
A successful basement window replacement requires careful planning and execution. Basic DIY skills are usually sufficient, making it accessible for beginners. Addressing potential issues such as water leakage, poor insulation, and structural deterioration during the process is essential.
The final phase involves adding protective trim and ensuring proper sealing to enhance energy efficiency and aesthetics. Following these tips will help you achieve a successful and satisfactory window replacement.
Choosing the Right Day
Choosing a dry day for the replacement task prevents moisture-related issues. Dry conditions ensure the new window is installed in an optimal environment, reducing the risk of future complications.
Upgrading to Energy-Efficient Windows
Upgrading to energy-efficient windows can enhance home comfort and reduce energy costs. Drafts and condensation between panes indicate the need for an upgrade. Routine inspections help identify potential issues like drafts or seal failures before they escalate.
UV-protective films shield basement windows from sun damage and keep them clearer for longer. Seasonal checks should assess window seals to prevent drafts and ensure proper insulation.
These upgrades can make a noticeable difference in your home’s overall improving energy efficiency.
Checking Local Building Codes
Compliance with local building codes avoids legal issues and ensures building safety. Installing a window well redirects water away from the basement window area, reducing the risk of leaks.
Proper drainage systems are crucial for preventing water-related issues.
Common Challenges and Solutions

Replacing basement windows can present challenges like uneven openings and drainage issues. Effectively addressing these can significantly improve the installation process and the longevity of your new windows.
Shims can level the window in uneven openings, ensuring a proper fit. Proper drainage systems must be installed to prevent water damage and ensure effective water management around the basement windows.
Handling Uneven Openings
To handle uneven window openings, use shims to level the window and ensure a snug fit. Fill any gaps with expandable foam before sealing.
Effectively using shims stabilizes windows in irregular openings during replacement, ensuring the new window is properly aligned and securely installed.
Addressing Water Drainage Issues
Preventing flooding around basement windows is crucial. Ensure the ground slopes away from the house at a minimum of 5% to allow surface water to drain effectively.
Installing free-draining backfill and a drainage mat against foundation walls minimizes hydrostatic pressure and reduces water infiltration risks. Regularly inspecting gutters and downspouts ensures they divert water away from basement windows.
Repairing Rot or Damage
Repair any rot or damage before installing a new window to ensure a stable fit. Remove the rot and replace the affected wood with new, treated materials to maintain the window frame’s integrity.
Maintenance Tips for New Basement Windows
Proper maintenance extends the lifespan and ensures the energy efficiency of basement windows. Regular upkeep enhances the durability and functionality of your new windows. Follow these simple maintenance tips to keep your basement windows in top shape for years.
Regular inspections, cleaning, and seasonal maintenance are crucial for preventing issues and maintaining basement window performance. These proactive measures identify minor problems before they escalate, ensuring continued effective performance.
Regular Inspections
Regular inspections ensure basement windows remain functional and issue-free over time. During cleaning, look for signs of wear, drafts, or water intrusion, which may indicate the need for repairs.
Clean the windows with a gentle soap solution or a mixture of vinegar and water using a soft cloth to avoid scratches.
Cleaning and Care
Regular cleaning and care maintain the appearance and functionality of basement windows. Check window seals and remove debris from wells as part of your seasonal maintenance routine.
Keeping windows clean and well-maintained extends their lifespan and ensures effective performance.
Seasonal Maintenance
Seasonal maintenance is crucial for detecting and addressing issues that could affect the performance and longevity of basement windows. Regularly check for drafts and seal integrity to prevent air leaks and energy loss, maintaining a comfortable basement environment.
Timely repairs on any signs of damage or wear can significantly extend the life of your basement windows. Seasonal cleaning removes dust and debris buildup, preventing scratches. These routine tasks keep your basement windows in excellent condition year-round.
Summary
Replacing your basement windows is a project that can greatly improve your home’s energy efficiency, safety, and overall aesthetic appeal. By understanding the types of windows available, identifying when replacements are needed, and following a step-by-step guide for installation, you can tackle this project with confidence. Remember to conduct regular maintenance to keep your new windows in top condition. With these tips and tricks, your basement will be a brighter, more comfortable space for years to come.